 |
Over the past few years, QuickBooks has evolved drastically, which makes it an ideal accounting software. It offers tons of features and functionalities. Many Quicken users look for different procedures that can be performed to move their data to QuickBooks. To make it easy, we are here with this segment, where we will be sharing the complete information related to moving your Quicken data to QuickBooks. There are two simple ways to switch and move your Quicken to QuickBooks desktop. One is to convert directly to QuickBooks desktop. Whereas, the other is using the Quicken converter to upgrade the file first.
To understand the conversion process in detail, make sure to read this segment carefully. You can also get in touch with our certified QuickBooks team of professionals for any further queries at 1-844-405-0907 and they will ensure to assist you in the conversion process.
See also: How to Fix QuickBooks is Unable to Verify the Financial Institution Issue?
What makes QuickBooks better than Quicken?
There are a few major differences between Quicken and QuickBooks, let us have a look:
Quicken software is ideal for personal use, whereas QuickBooks is better for small and mid-sized businesses. Furthermore, Quicken can be used for seamlessly handling and managing rental property and QuickBooks is all about accounting and bookkeeping. Quicken is not cloud-supported, but QuickBooks is supported on the cloud.
Important things to consider
Before you head to the process, make sure to check out the below pointers.
- One of the most important points to be noted here is that the process of file conversion from Quicken to QuickBooks can’t be reversed. Thus, be sure when performing the conversion steps.
- Moreover, make sure to create a backup of the quicken data that is to be converted, as you might have to access this data in Quicken software.
- Also, in case you have used Quicken software on Mac, then you will have to convert Quicken Mac files into Windows files first, as only Windows files of Quicken can be converted to QuickBooks.
You may also like: How to Set up folder and Windows Access Permissions to Share Company Files?
Steps to Convert Quicken Data into QuickBooks Desktop Data
The user can try performing the below set of steps to convert Quicken data into QuickBooks desktop.
Step 1: Make use of Quicken Converter
It is important to ensure that you are not having another version of it installed. In case you already have it installed on the system, then ascertain to uninstall Quicken Converter from the system and then download the right one below:
At first, download the version of the converter tool which matches the year version of QuickBooks Desktop:
- Quicken 2023 Converter
- Quicken 2022 Converter
- Quicken 2021 Converter
- Quicken 2020 Converter
- Quicken 2019 converter
- Quicken 2018 converter
- Quicken 2017 converter
Now, you can install and convert by using the steps below:
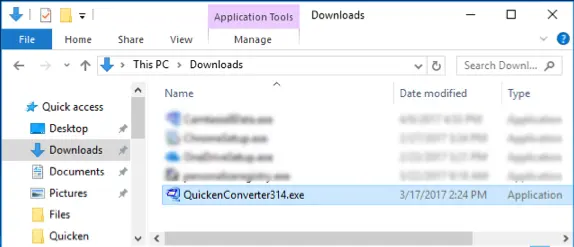
- Start with, launching the downloaded Quicken converter and then hit Next.
- Once done with that, select I accept the terms in the license agreement, and click on Next.
- The user is then required to Start the installation of the Quicken converter also, select Next and hit Install.
- Go for Launch Quicken converter and click on Finish.
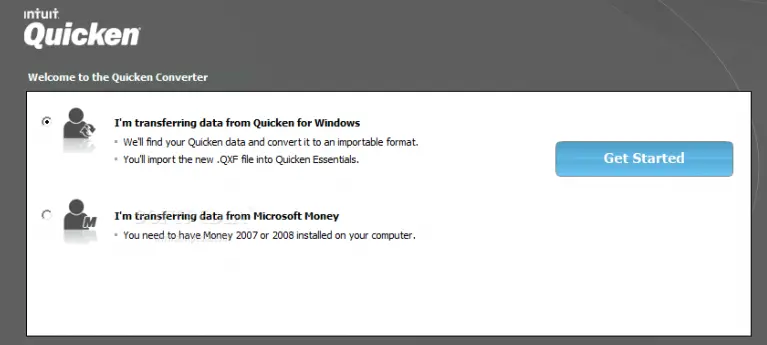
- After that go for I am transferring data from Quicken for Windows and also select to Get started.
- The next step is to choose open a data file located on this system and then opt for the select File option.
- Browse to opt for the Quicken file and then hit OK button.
- Choose Convert it and also hit the OK button.
- Lastly, click on save the new Quicken data file and choose Save, and also hit the Edit option.
Visit also: How to Troubleshoot QuickBooks Error Code 1603?
Step 2: Search For .QDF And Not .QFX
Along with creating a .QFX file, the tool also creates a .QDF file. This is the file that you want to convert, not .QFX. You need to head to the upgraded .QDF file in a folder named Q18Files or Q17Files, which is at the same location as your original Quicken file. The .QDF file might also have the same name as the original data file.
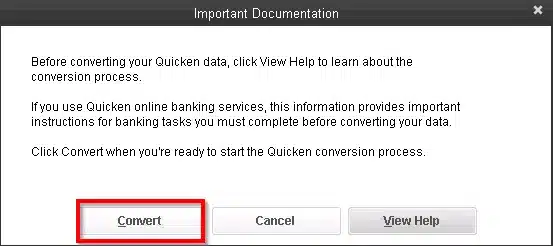
Step 3: Using the Conversion Utility to fix Quicken Data into QuickBooks Desktop
One can easily convert the Quicken file using the conversion utility in QuickBooks. The below stated steps can be of great assistance in this case.
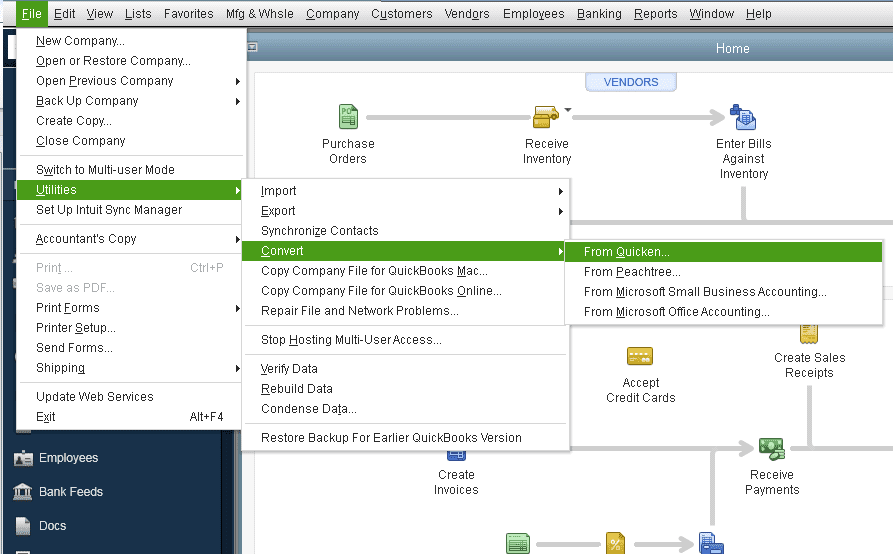
- At first, head to the File option and then choose Utilities.
- Go for the convert option and select Quicken.
- Now, select the Quicken file [.QDF] that you wish to Convert.
- Also, click on Convert.
- You will see a few steps for conversion utility all through the rest of the conversion. Make sure to perform them.
- Note that you can also press the F1 key to access the help window in QuickBooks Desktop to get any further details related to the conversion utility. Or type convert from Quicken.
- In case you have used the Quicken Conversion Tool you will see a folder on your desktop having the appropriate QDF file to use. The folder will be named as Q12Files or Q13Files.
Steps to Move your Quicken Data to QuickBooks Online
If you are a QuickBooks online user, then it should be noted that the steps to move data in QuickBooks online might differ from QuickBooks desktop. Thus, make sure to go through the below set of steps to successfully move the quicken data to QuickBooks online.
You may visit: How to tackle QuickBooks Error 1723?
Step 1: Export the Quicken Data in .csv format
- The very first step is to export the Quicken data to a .csv file.
- Followed by performing the steps to import to QuickBooks.
Step 2: Import the .csv File into QuickBooks
After saving the crucial Quicken data in the .csv file, it is recommended to import it to QuickBooks.
- This can be done by signing in to your QuickBooks account.
- Now, hit on Settings.
- Within settings, go for the option to Import Data.
- Now, select the list type to import.
- Also, click on Browse.
- Identify the .csv file you created in Step 1.
- Select the file and click on Open.
- Also, hit the Next tab.
- The Map data page will show up on your screen.
- Now, click on the dropdown menus for mapping the fields.
- After that click on Next.
- Double-check if all the entries are correct.
- Click on the Import option for importing the file to QuickBooks Desktop.
Step 3: Connect to your financial institution
Here you are supposed to connect to your bank account via QuickBooks to group your transaction-related data.
To Conclude!
QuickBooks has proved itself in the past few years, and gradually almost every business is moving to QuickBooks, in order to manage the accounting and daily financial activities smoothly. Thus, reading the above set of steps and implementing them might help you in moving from Quicken to QuickBooks. However, if you are stuck at any point in time, or if you require any sort of assistance, then, in that case, consulting our QuickBooks tech support team at +1-844-405-0907 is recommended. We are a team of certified QuickBooks professionals who work round the clock in providing immediate support services.
See more Helpful Articles
How to Resolve QuickBooks Error Code 1334?